Integration with APM on Pixhawk
μLanding supports UART data transmission protocol which makes it convenient to connect with a variety of flight controllers such as Pixhawk, APM and OcPoC. This guide provides a brief introduction on how to connect Pixhawk with μLanding and how to read altimeter information from μLanding in Ardupilot.
1. Connect to Pixhawk
Connect the UART Tx pin (GREEN) on μLanding to the Pixhawk UART4 Rx (BROWN) pin as shown below. Pixhawk will provide the regulated 5V (RED-power and BLACK-ground) power supply for μLanding.
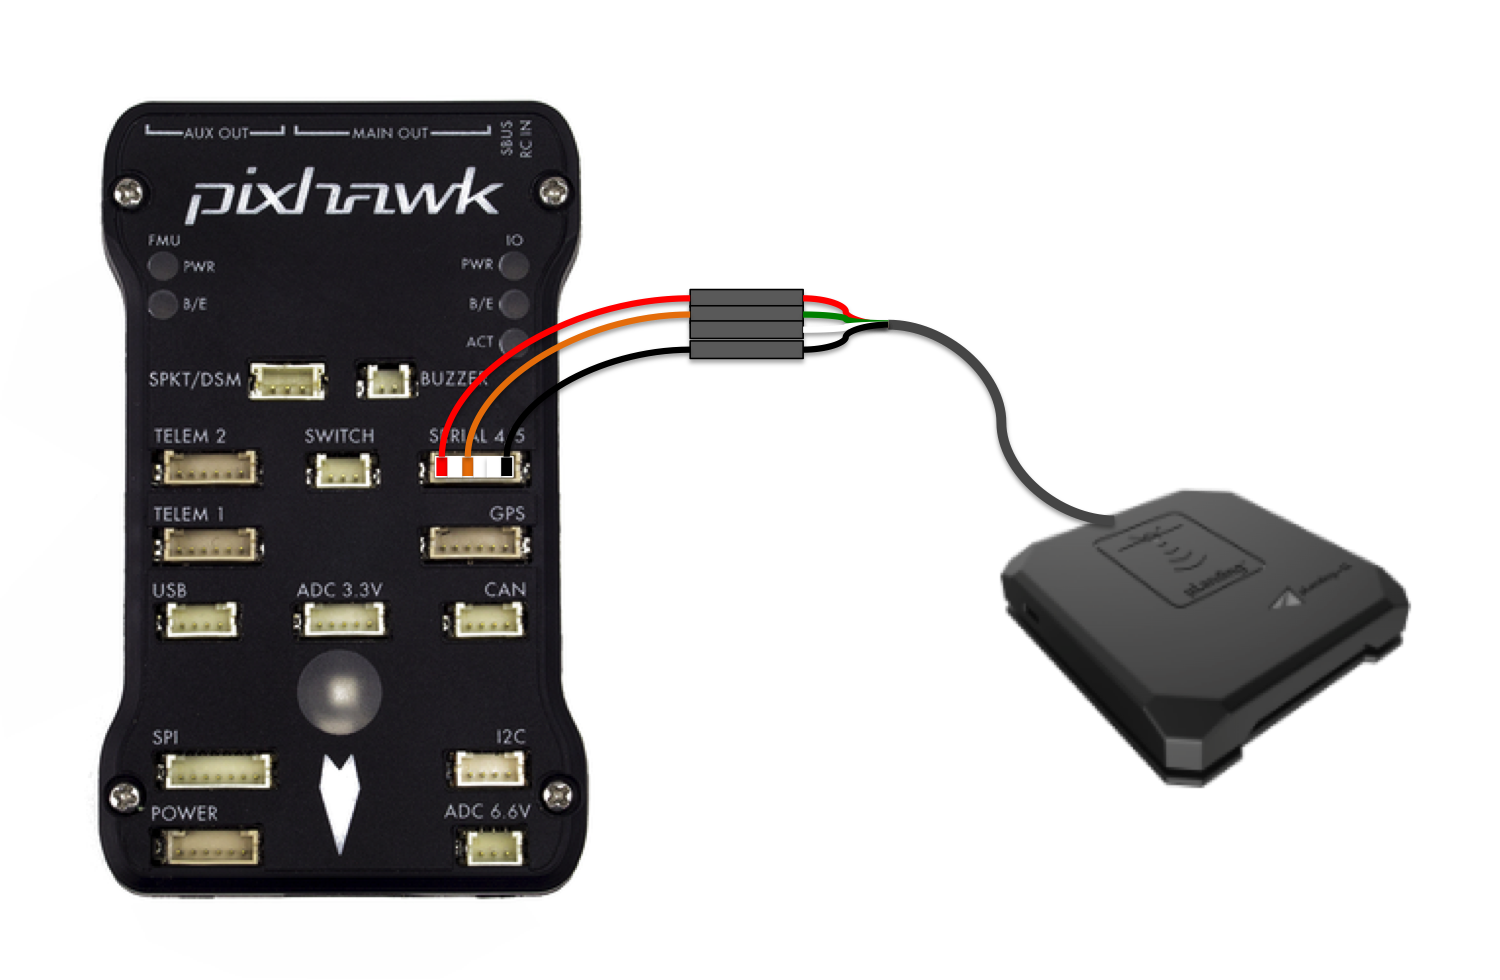
uLanding to Pixhawk wiring diagram
2. Add Code in Ardupilot
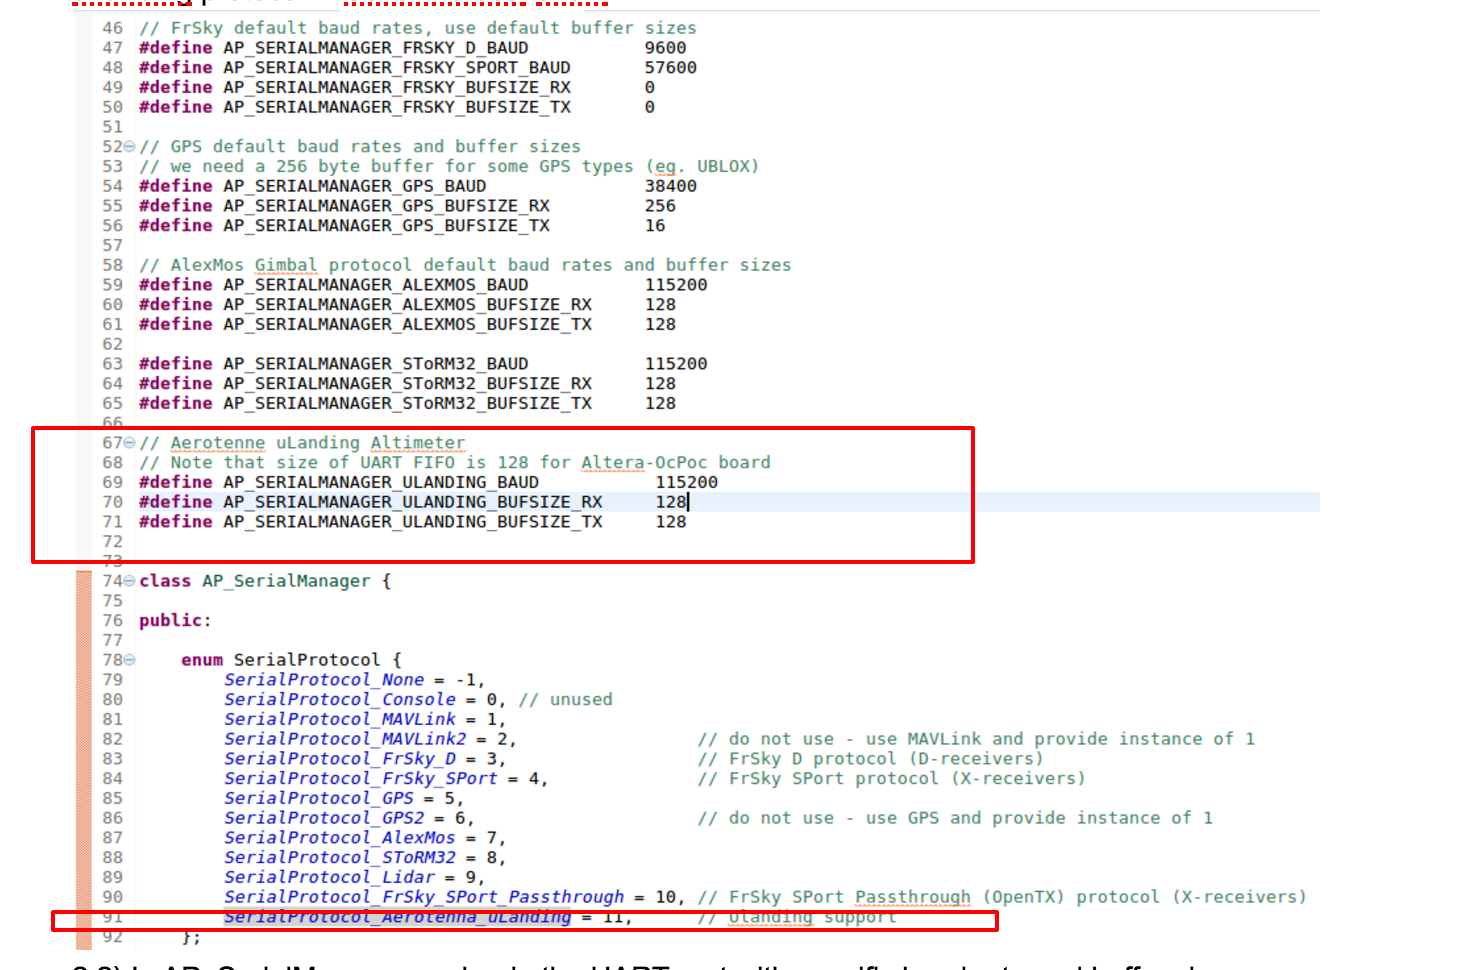
2.1) In AP_SerialManger.h, define the buffer size and baud rate of μLanding, then add μLanding protocol in SerialProtocol enum:
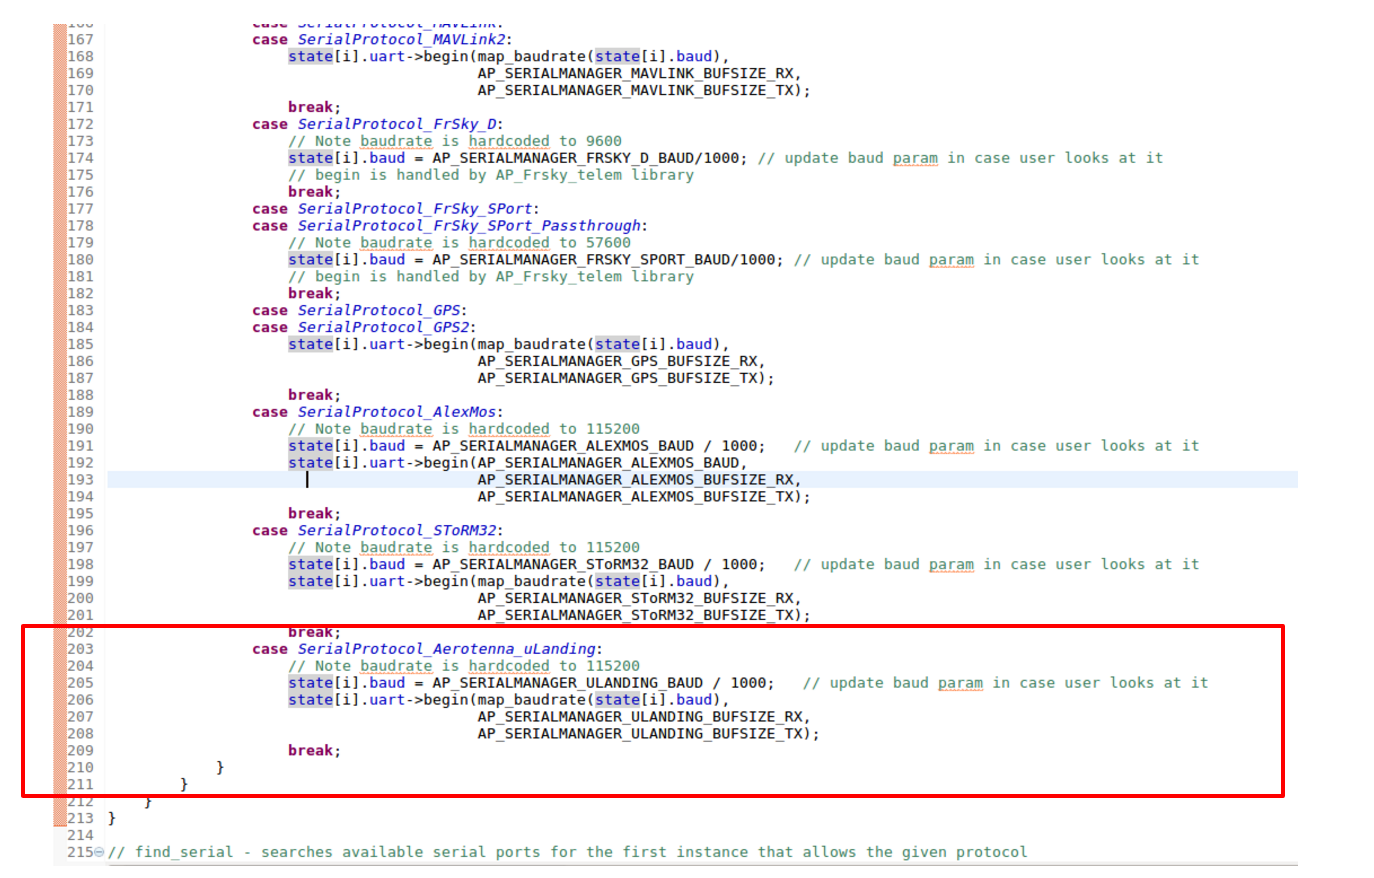
2.2) In AP_SerialManger.cpp, begin the UART port with specific baud rate and buffer size.
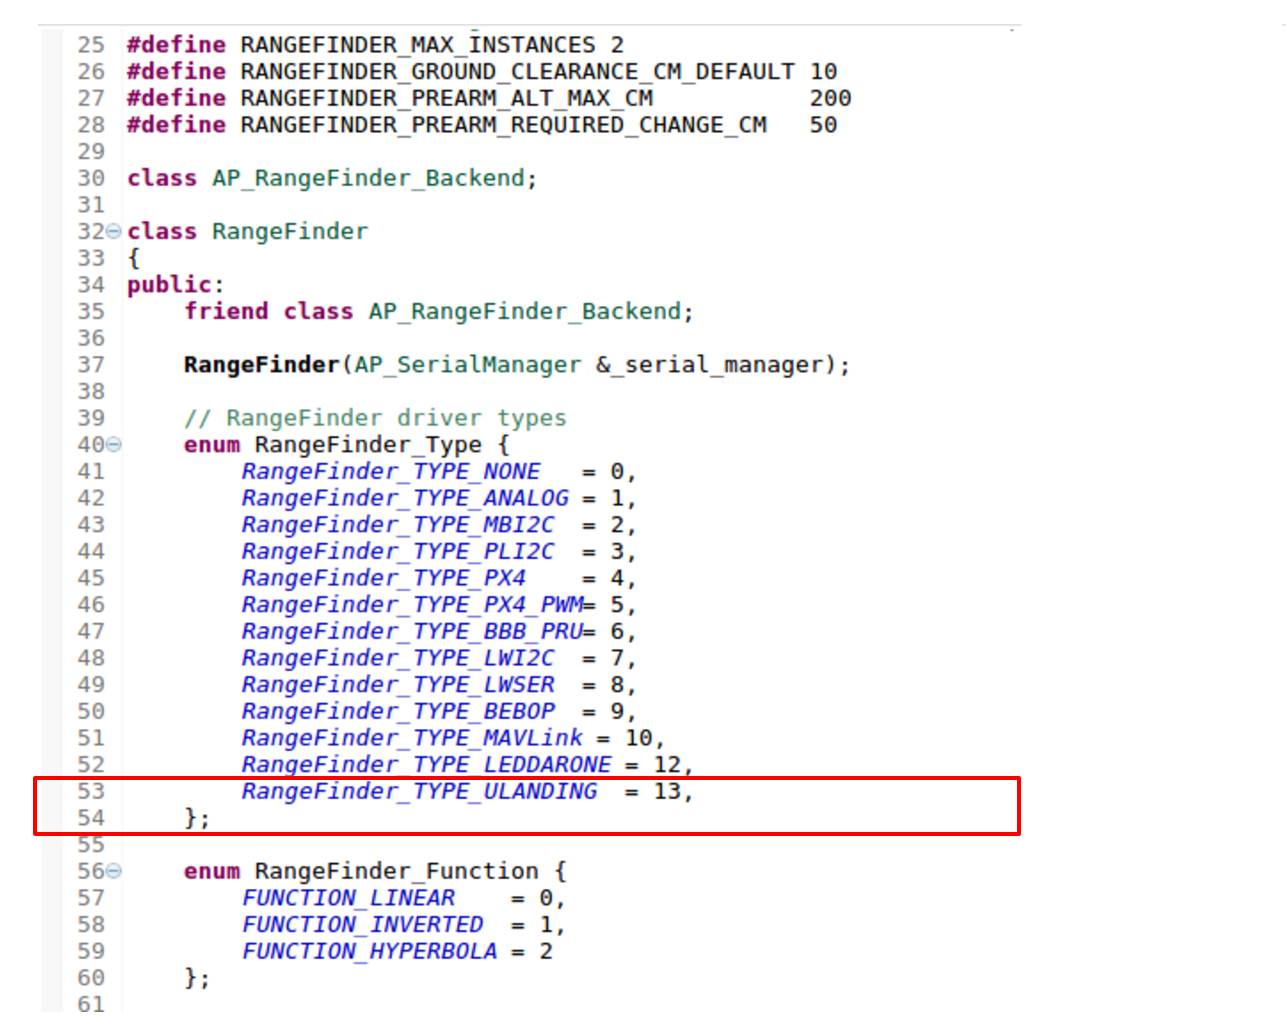
2.3) In RangeFinder.h, add μLanding driver:
2.4) In RangeFinder.cpp, add μLanding detect function:

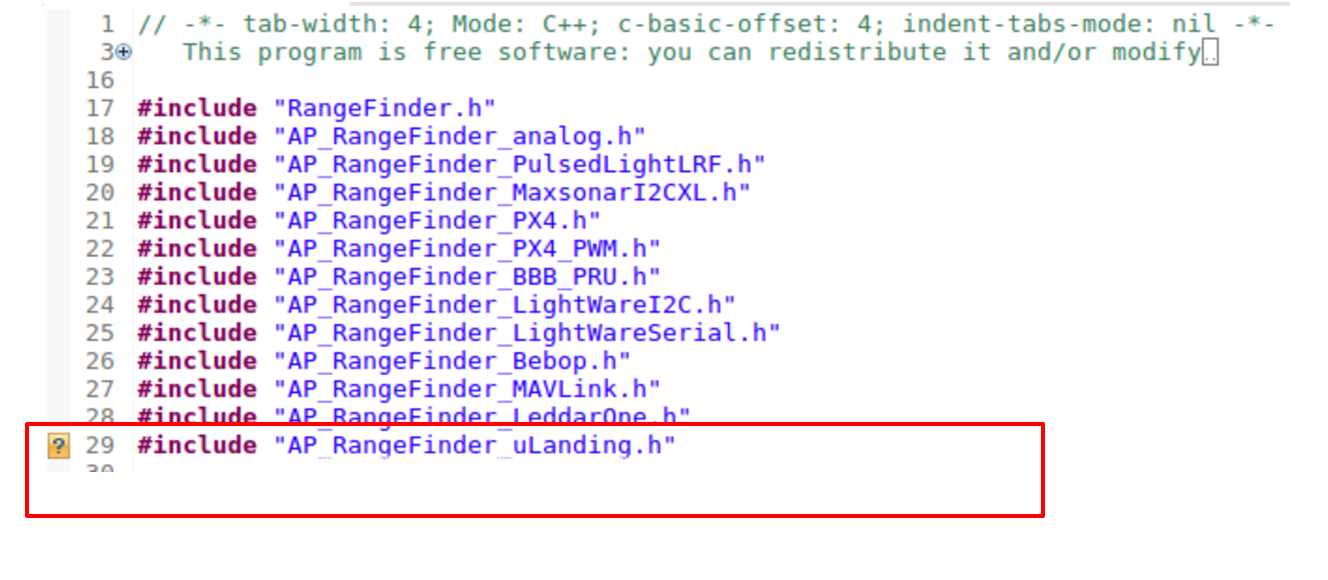
2.5) Add AP_RangeFinder_uLanding.cpp and AP_RangeFinder_uLanding.h into /ardupilot/libraries/AP_RangeFinder directory.
3. Setup in MissionPlanner
- Setup in MissionPlanner:
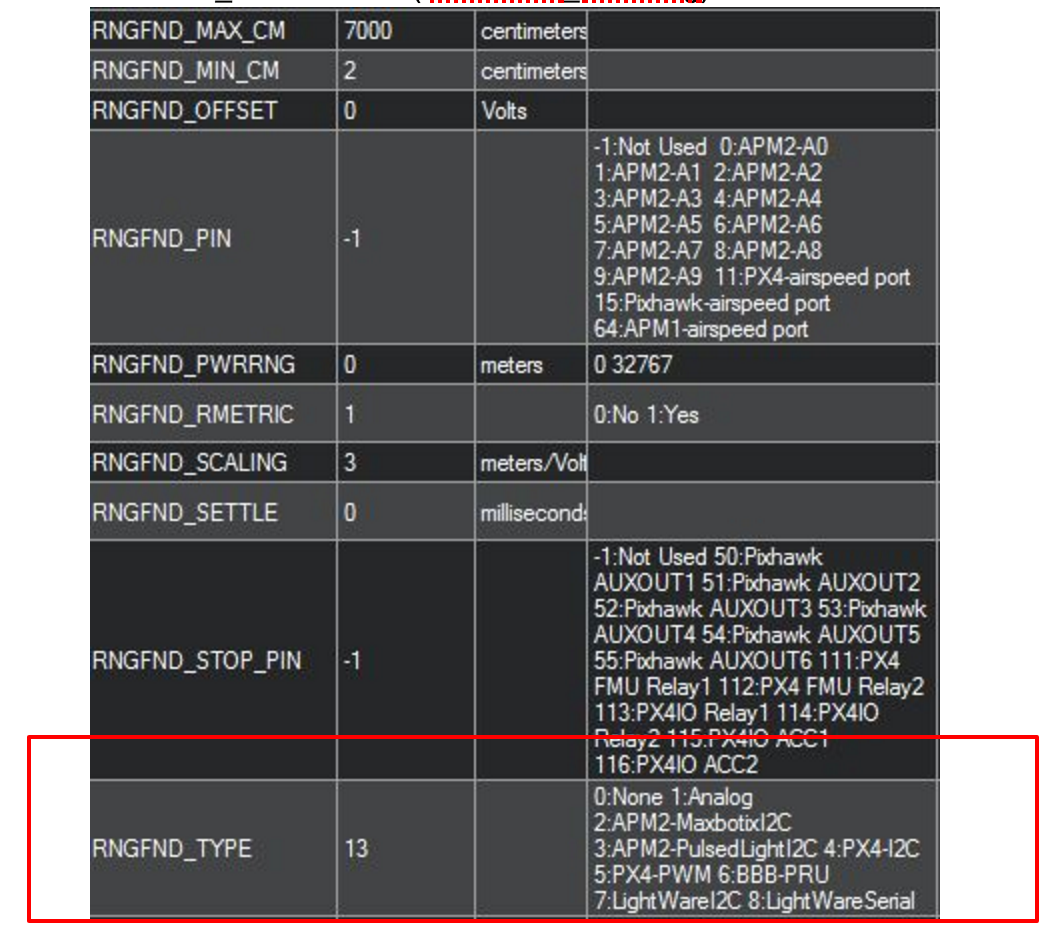
3.1) To configure Copter, Plane or Rover to use μLanding, connect with the Mission Planner first and then open the Config/Tuning >> Full Parmeter List page and set:
RNGFND_TYPE = "13" (Aerotenna_uLanding)
SERIAL4_BAUD = "115" (115200)
SERIAL4_TYPE = "11" (uLanding)

- Test the sensor
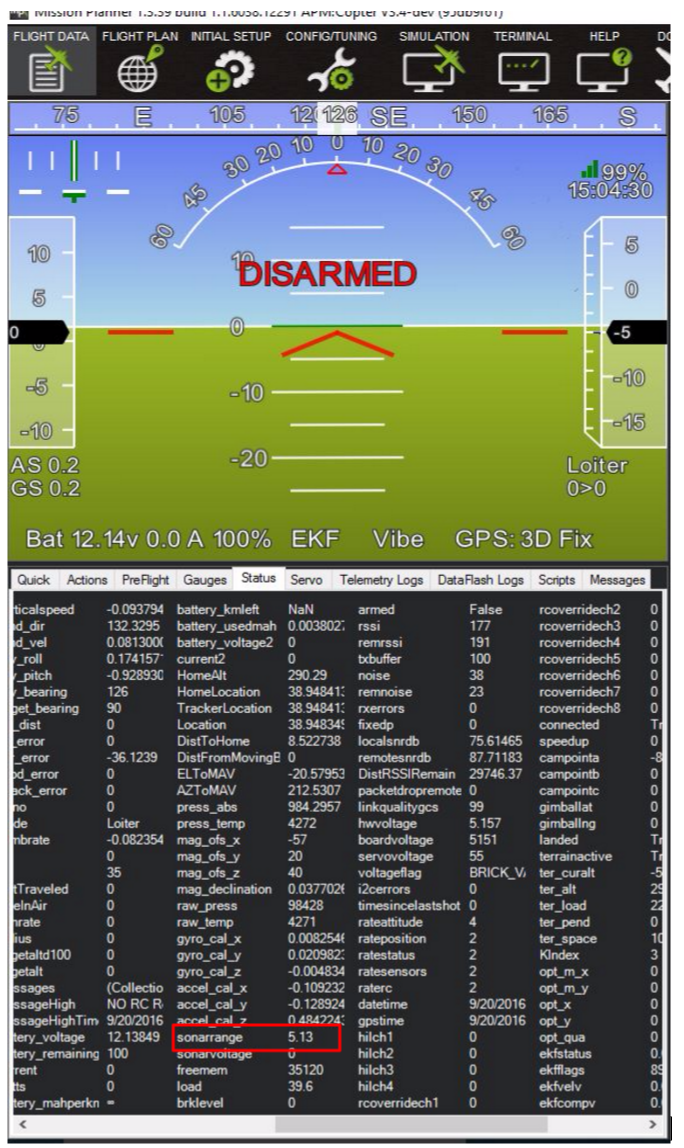
Distances read by the sensor can be seen in the Mission Planner’s Flight Data screen’s Status tab. Look closely for “sonarrange”.
4. Demo Video
Updated less than a minute ago
