Load ArduPilot Files onto SD Card
This Documentation is done in a Ubuntu 16.04 environment.
In a terminal navigate to the folder where you cloned 'OcPoC_Mini_Zynq_Files' and execute the following commands.
cp uImage devicetree.dtb uramdisk.image.gz BOOT.bin /media/<your_username>/boot/
cd Ardupilot_rootfs/
sudo cp ubuntu-rootfs1.tar.gz ubuntu-rootfs2.tar.gz /media/<your_username>/rootFs/
cd /media/<your_username>/rootFs
sudo tar xvf ubuntu-rootfs1.tar.gz
sudo tar xvf ubuntu-rootfs2.tar.gz

sudo rm ubuntu-rootfs1.tar.gz
sudo rm ubuntu-rootfs2.tar.gz
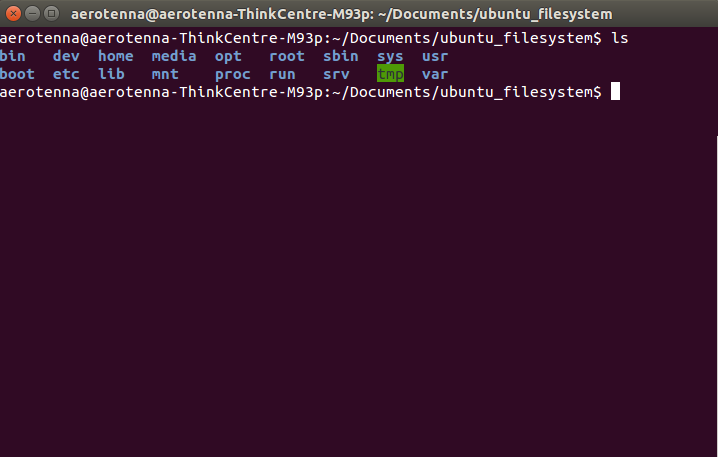
ls

Your screen should match this.
You are now ready to compile the autopilot!
Build ArduPilot Executable
Now we have to compile the ArduPilot code for the OcPoc-Mini. In a terminal navigate to the directory where you downloaded the ArduPilot source code.
Now that you are in the correct directory, first initialize and update the git submodules, then compile the executable with the commands below. OcPoC has support in the master branch, but it's generally best to start with a stable branch. The ocpoc_zynq build target is now available in Copter-3.6 and plane3.9; the example below presents how to start from Copter v3.6.
git checkout Copter-3.6
git submodule update --init --recursive
Tools/scripts/install-prereqs-ubuntu.sh -y
./waf configure --board ocpoc_zynq
./waf --targets bin/arducopter
cd build/ocpoc_zynq/bin/
sudo cp arducopter /media/<your_username>/rootFs/root/
Note: It is important to get the 'arducopter' file into the the 'root' directory on the OcPoC's root file system
Now we have all of our files loaded onto the SD card. You can eject the SD card and insert it into its port on the OcPoC Mini and continue to Running ArduCopter on OcPoC Zynq Mini
Updated over 7 years ago
